The fields of GPS and GIS are growing exponentially with new and innovative technologies that keep pushing the field forward. However, the limitations of GPS signal and Wi-Fi capabilities still persist. Often times, field workers find themselves in situations without a reliable data connection or no connection at all. Luckily, ESRI has innovated their way around that obstacle to allow you to collect data without a data plan or Wi-Fi connection.
This blog post will show you a workflow on how to prepare your maps and data before going out into the field so that you are ready to collect in an offline area.
- Enable your feature layers and basemaps for offline use
- All default ESRI basemaps have already been enabled for offline use. As long as you are using an ESRI basemap then you don’t need to worry about enabling the basemap for offline use.
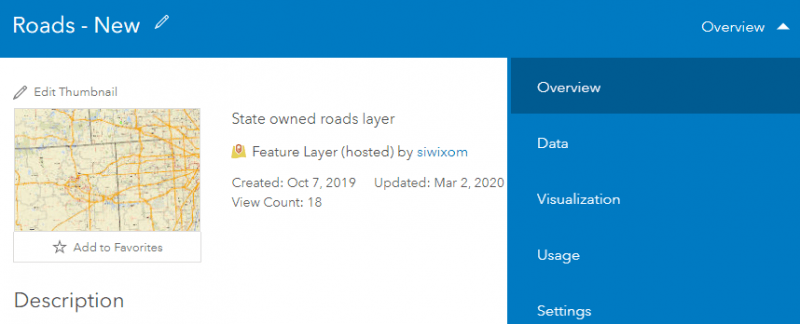
- Go to your profile’s Content tab and select the feature layer you wish to enable for offline use. This will take you to the Overview page for this feature layer.

-
- From this page, select the Settings tab and scroll down to the Feature Layer (hosted) section to select Enable Editing and Enable Sync. By doing this you have just enabled that feature layer for field collection and use in offline mode. If you do not complete this step you will not be able to collect data!!!
- Create a web map
- Add the feature layer(s) you want including the one you are collecting field data for.
- Save that map and share it to your organization. You can find the Save and Share tools on the top toolbar of the Map Viewer.
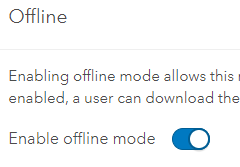
- Enable Offline mode for your new webmap. To do this, go to the webmap Settings from the Overview page. Scroll down to click the Enable offline mode button, save when done.

- Open Collector
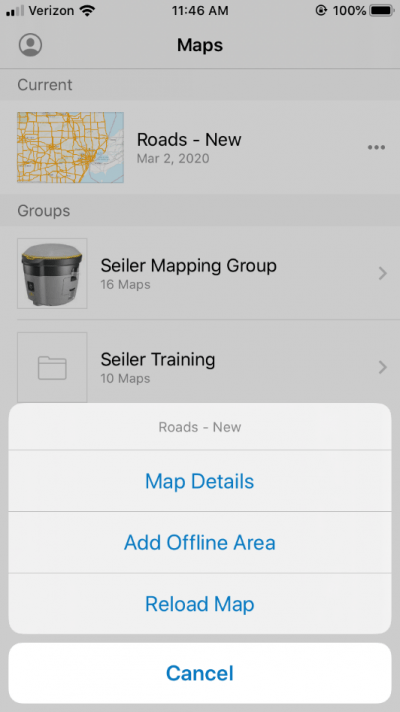
- Now that you have shared your new webmap to your ArcGIS Online organization, you can open the Collector app and the webmap will appear in your selection of maps.
- Tap the 3 dots next to the title of the map you are collecting data in and select Add Offline Area.

- Pan and zoom to the area you are going to be collecting field data in.
- Select the level of detail you would like to see on your basemap. Higher detail shows more basemap detail when zoomed in. Less detail means less download time and vice versa.
- Download area. What this does is it downloads the map area you chose to your iOS device so it doesn’t need a data plan or Wi-Fi connection to load the map.
*TIP* – In Profile settings, go to the Download & Sync settings to enable Auto-Sync. This will automatically sync your data back to ArcGIS Online once you get service or Wi-Fi.
- Pair your iOS device up with a top of the line Trimble GNSS Receiver and start collecting data!
Disclaimer: For sub-foot or better accuracy, an internet connection is required to obtain VRS or RTK corrections. This article is for iOS devices only. Storage space is also limited on certain models of iPhone/iPad.

I recommend to not use the Auto-Sync. If you need to work offline, you are probably in an area with poor cell coverage and if you are trying to sync over this service, there is a higher likelihood that you will get a corrupted sync. It is better to only sync with a reliable Wi-Fi connection.
Patrick,
Auto-sync is one of the top used features within this new release of Collector and we highly recommend you use it. Attempting to sync with a low-bandwidth connection will not impact the locally cached features on your device nor replicas on the server as well. In the new version of Collector we provide you with a sync panel that shows pending edits as well as the root cause of any failure as well. In addition, the troubleshooting profile setting will let you email a complete log of the sync process to your admin if needed.
There are 2 reasons why a sync will continually fail:
1. Feature service is set for bi-directional sync and there are a lot of photo attachments to download in your offline area (consider using the advanced settings for sync)
2. Someone has published an update to a hosted feature service and overwritten all replicas that were created. (don’t do this)
If you encounter any other issues with sync, please contact Esri Support. Low-bandwidth is not a reason to not auto-sync. Sync when you can!